As of FactoryPMI 3.3.0, the Table component supports editing in its cells. This feature allows the user to edit cell data by double clicking in the cell. The information can then be sent back to the SQL database without creating a form in FactoryPMI. This article describes how to setup and configure the table to allow editing.
Step 1: Drag a Table Component into the Window
The first step is to drag in a Table component, from the Input tab on the Component Palette, into a Window.
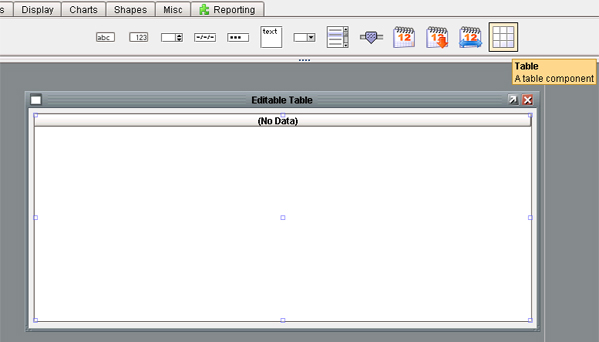
Step 2: Link the Table to a SQL Table
Once the table is in the window, the next step is to bind the Data property to a SQL query pointing to the table you want to edit in the database. To do this click on the Bind icon to the right of the data property and select the DB Browse or SQL Query binding type. Then, either select the table you want to edit or type in a SQL query for that table. Here is a sample query:
SELECT * FROM customers
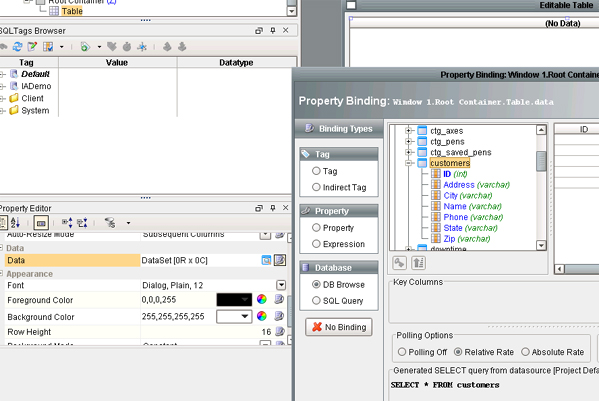
Once you have the table selected or query entered press OK and your data will come through on the table component.
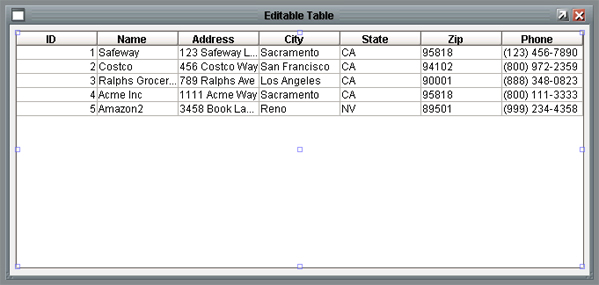
Step 3: Set Which Columns are Editable
Now that the table component is showing data, you need to set which columns will allow the user to edit in the run-time. This way a user can double-click in any cell in those columns to change the value. To do this, right-click on the table component and select Component Customers -> Table Customizer.
The Table Customizer is where you configure the columns' display properties, as well as any row mapping configuration. When you open the Table Customizer, you will see a table that has all of your data's columns across the top, and all of the column display properties across the left. You can configure each column to have its own display properties. Once such column display property is called Editable. By checking the box you are allowing that column to become editable in the run-time.
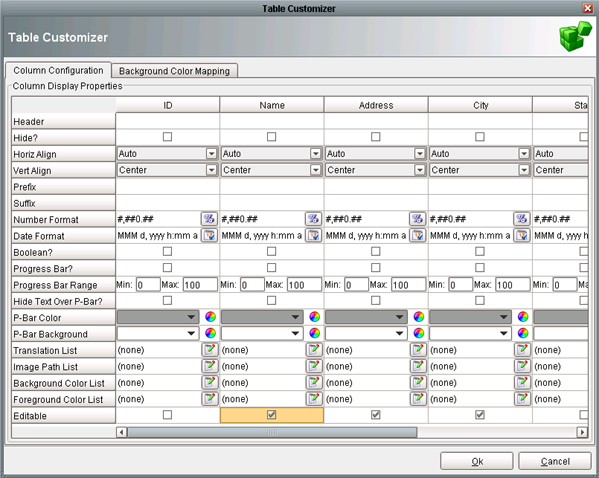
Once you have selected all of the columns you are allowing to be editable, press OK.
Step 4: Respond to Cell Edit
Any time a user double-clicks in an editable cell and changes the value, all valid changes will be reflected back in a change to the table's data property. The SQL table does not get updated automatically. At this point, all changes can be mapped back to a database in scripting.
Once a valid change has been made, the table will fire a cellEdited event that contains the row, column, previous value, and new value for the cell. Remember, if the table's data is bound to a polling query binding, the edited dataset will be overwritten with whatever is in the database. You can use the cellEdited event to issue a SQL UPDATE query that will make the edit in the database as well.
To create a script that will issue the SQL UPDATE query, right-click on the table component and select Configure Actions. Here you can respond to events that get fired, such as a mouse-click or cell edited event. On the left-hand side, you will see a cellEdited event under the cell folder. Select the cellEdited event and then select the Script Editor tab on the right-hand side. Here you can create a small script that will issue the UPDATE query. Here is an example script:
# The row index of the edited row row = event.row # The column index of the edited column col = event.column # The column's name colName = event.source.data.getColumnName(col) # The new value value = event.newValue # The primary key's value (first column), so that the appropriate row can be updated in the db id = event.source.data.getValueAt(row, 0) # Run an update query to the table that is being edited to reflect any changes fpmi.db.runPrepStmt("UPDATE customers SET %s = ? WHERE ID = ?" % colName, [value, id]) 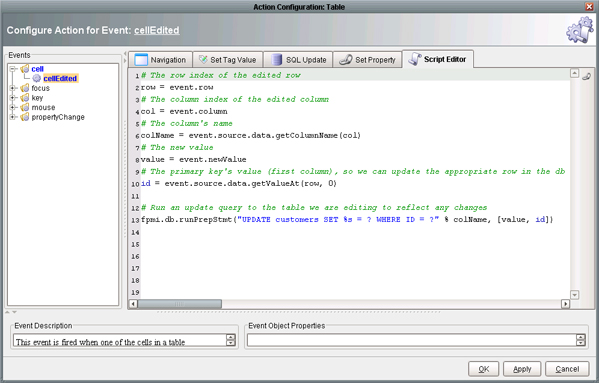
Copy the script into your project and change the table name to reflect the SQL table you are editing.
Summary
Save your project and open up a FactoryPMI client to give your new editable table a try. If you would like a pre-made editable table to learn from, download it here. For information on how to install the pre-made editable table click here for instructions.
As always, if you have any questions about this article please visit our forum at forum.inductiveautomation.com or call us at (800) 266-7798 for support.